
What you will Learn:
- Branches overview
- Create new branch
- Switch to a new branch
- Switch to main branch
- Create a new file on the new branch
- Push branch to GitHub
Branches overview
A branch represents an independent line of development.
To understand it better, you can see ‘4 commits’ link below
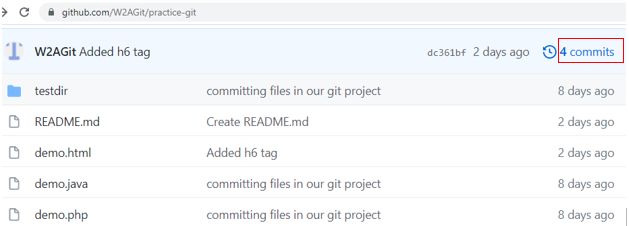
Click this link. As you can see below, each commit is represented by a hash number. The numbers are the hashes for each commit
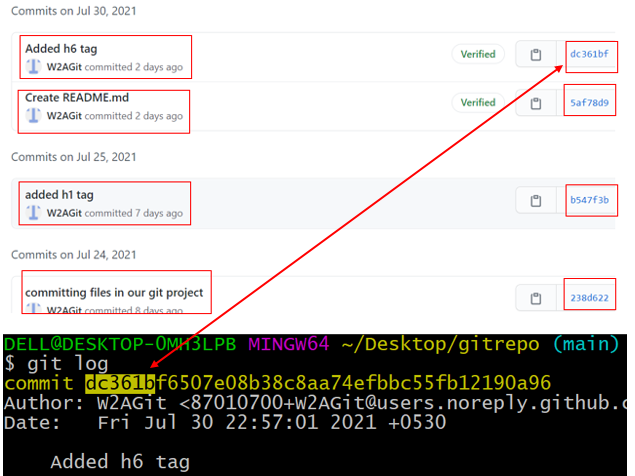
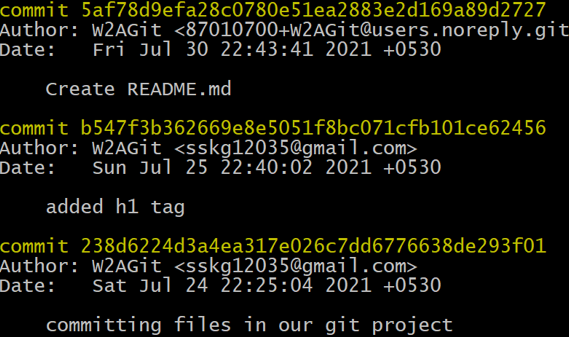
All these commits are inside a main branch or master branch. Main (or master) branch is the default branch. The hash numbers can also be seen in the ‘git log’ command, see above.
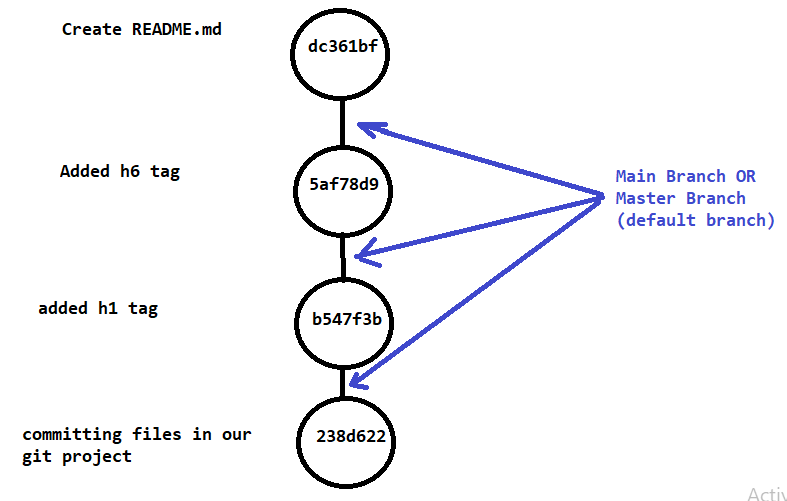
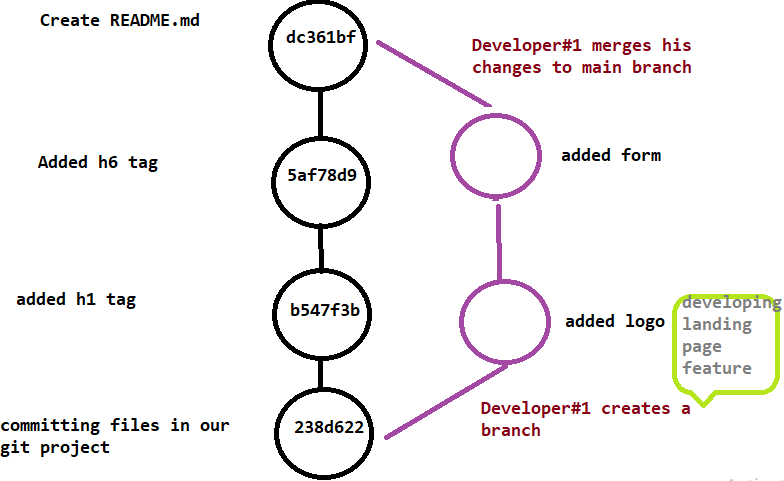
So the main branch can be represented as below. The left hand side shows the respective commit messages
Now, if 2 developers are working on the same project, each developer will create a branch for the respective feature they will be working on and then they start their development work. Once the developer is done with their respective feature, they will merge their branch with the main branch, see below
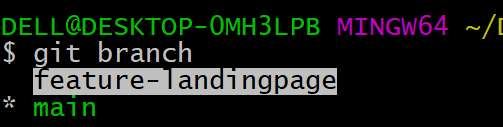
If you want to know the branch name you are working on in your local machine, type ‘git branch’

The asterisk * represents the current branch we are in.
If you want to know the branch name in remote GitHub repository, type ‘git branch -r’

To know the name of all the branches, type ‘git branch -a’

Notice that the red color in previous 2 commands signifies the branch on remote GitHub. The asterisk * represents the current branch we are in
Also Check: Selenium Python Training
Create new branch
To create new branch, we take a copy of existing branch and then you can make any changes in your branch without affecting main branch. So we use ‘git branch <feature-name>’ syntax to create a branch

Now if we execute ‘git branch’ we will see our new branch name
Switch to a new branch
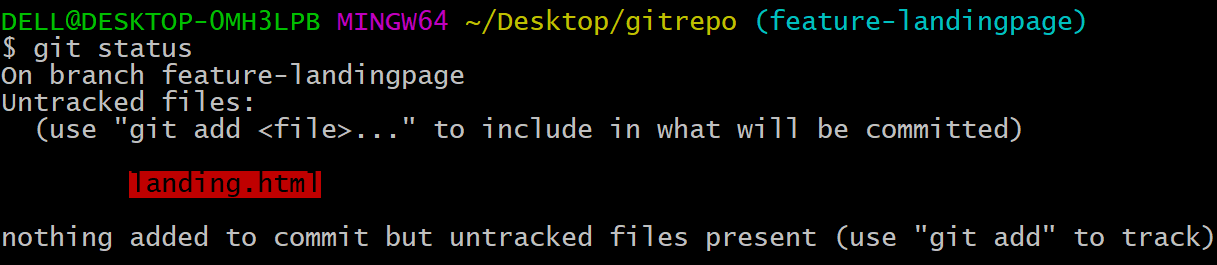
Before we make any changes to our new branch, we have to first switch to it. Use command syntax ‘git checkout <branch-name>’ to switch to a desired branch. After executing the command, notice that we see (feature-landingpage) in the next command line, see below

Switch to main branch
Simply execute ‘git checkout -‘ to switch to master branch

To switch back to new branch, you can again execute the same command

Create a new file on the new branch
Create a new file under this new branch

As expected, the ‘git status’ command shows the untracked file
Let us add and commit the file
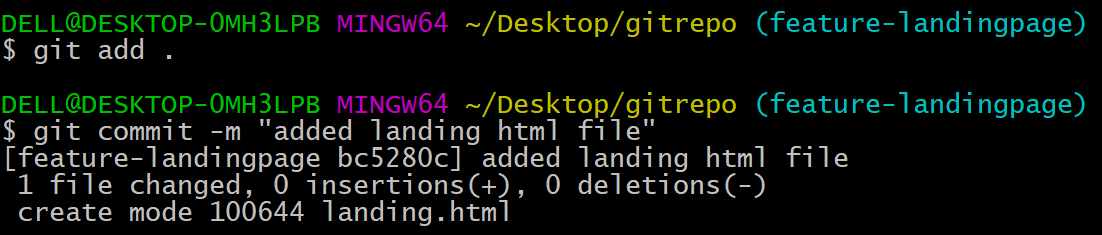
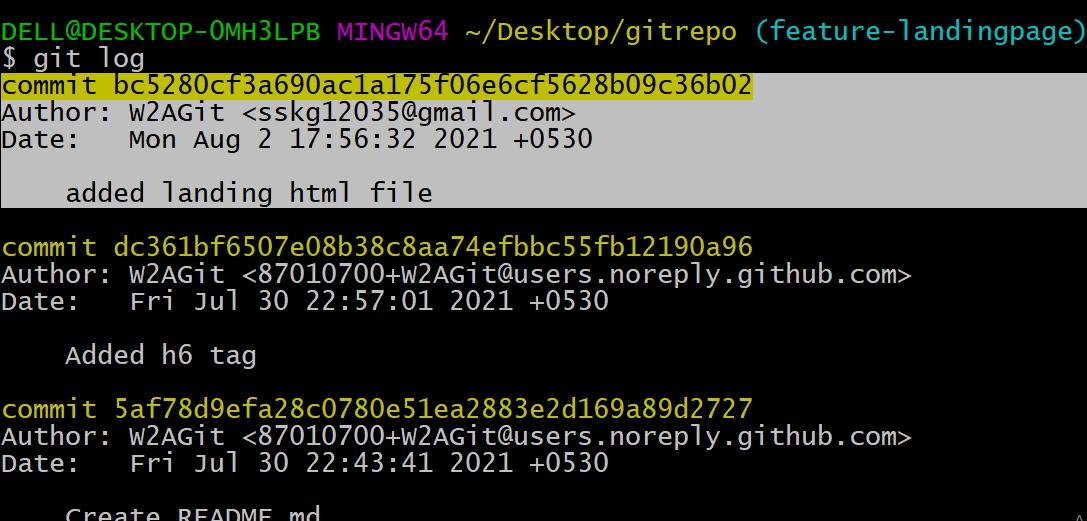
The ‘git log’ will reflect the above commit as its last commit
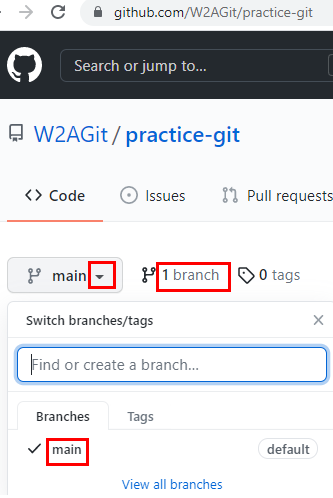
This branch is not yet on GitHub, see below
Also Check: Selenium Training Online
Push branch to GitHub
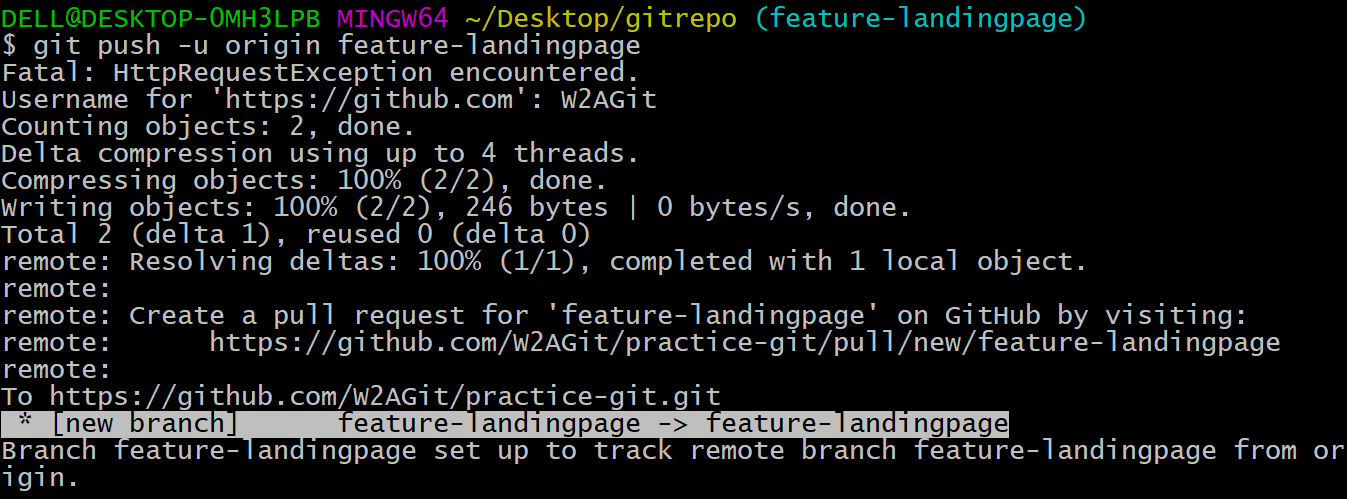
Let us push this new branch to GitHub. Just execute ‘git push’. You will get the exact command you need to run

You can either use the above highlighted command OR you can also use ‘git push -u origin feature-landingpage’.
Type username and password, you can now see the new branch gets pushed to GitHub
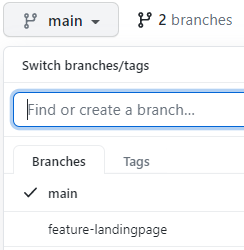
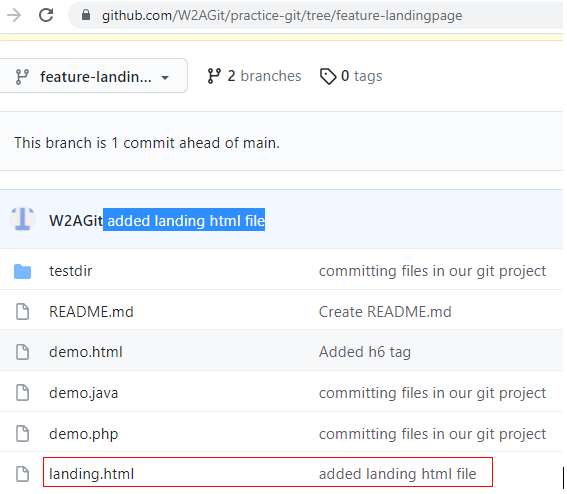
Refresh the GitHub, you can now see 2 branches
Select the branch from the above dropdown, you can see the new file, see below
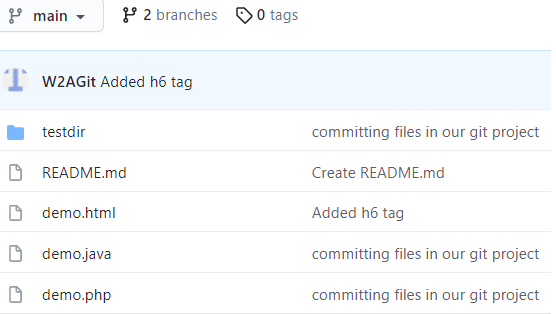
However if you switch back to main branch, you will not see this landing html file
Thank you for reading!
Also Read: Tutorial 6: Push changes to GitHub